Entering Recipient Data


To Import Data into 1099Express, see: Importing Data  I  To Roll File(s) forward from Previous Years, see: Bringing File(s) Forward


There are a few ways to add data into the grid of 1099Express.
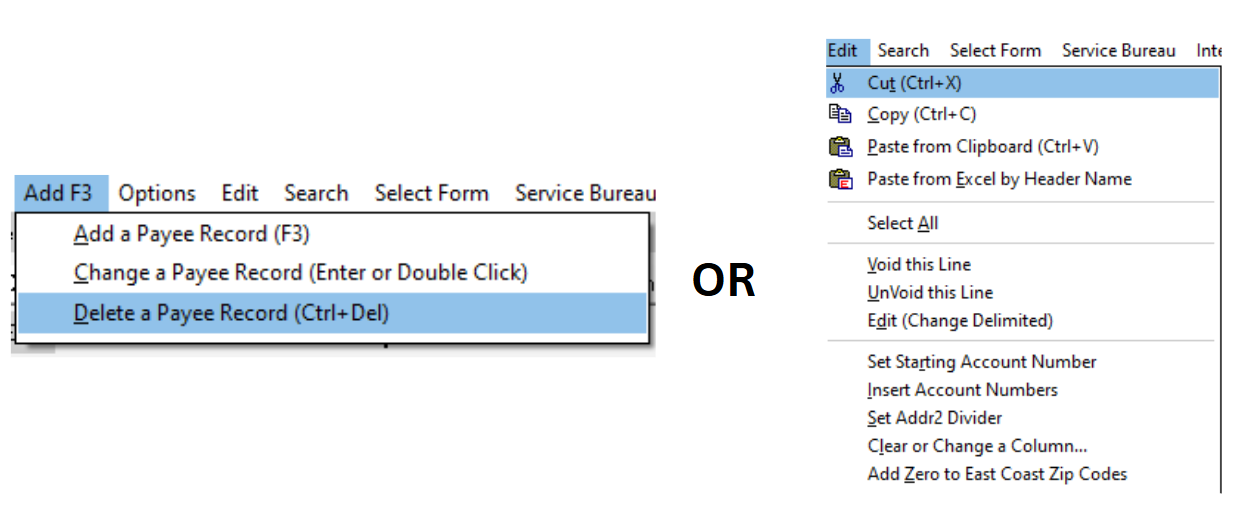
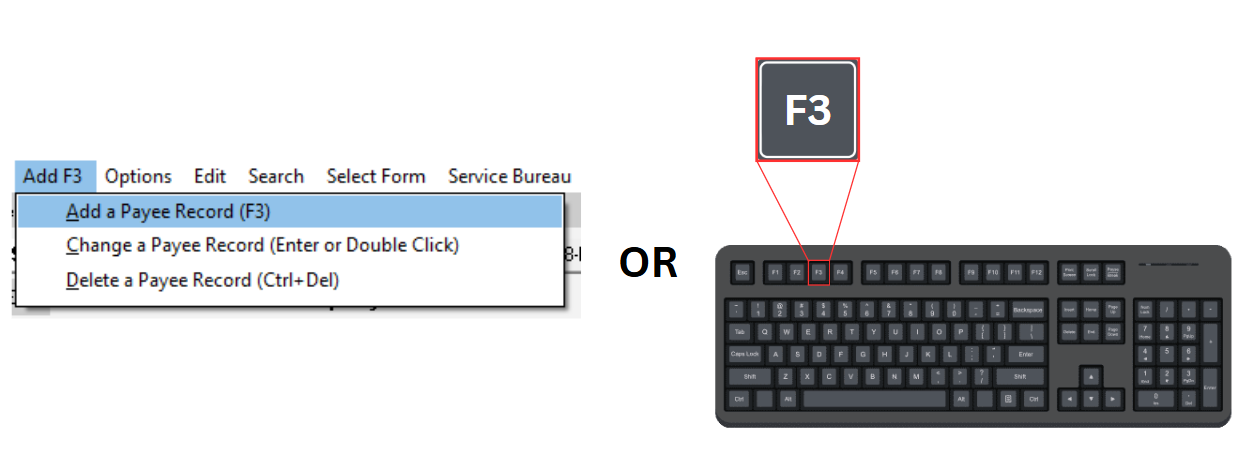
The quickest way is to either click the 'ADD F3' menu in the top-left corner or simply press the 'F3' key on your keyboard.

From the drop-down menu, select 'Add a Payee Record (F3)'.

After selecting the AddF3/Add a Payee Record, a form window will appear.
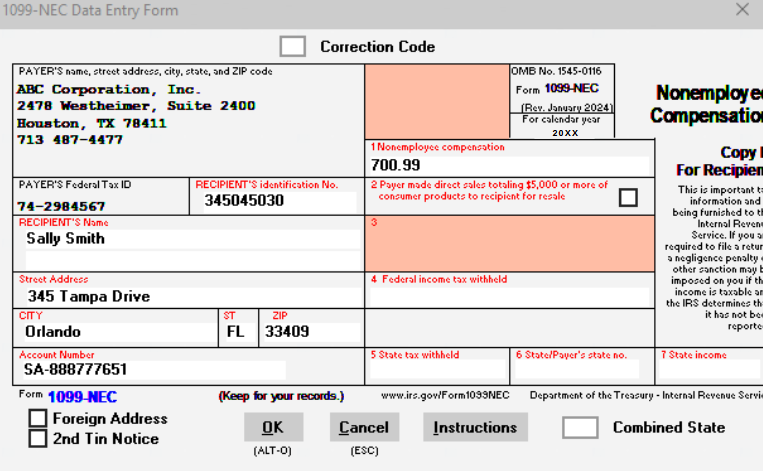
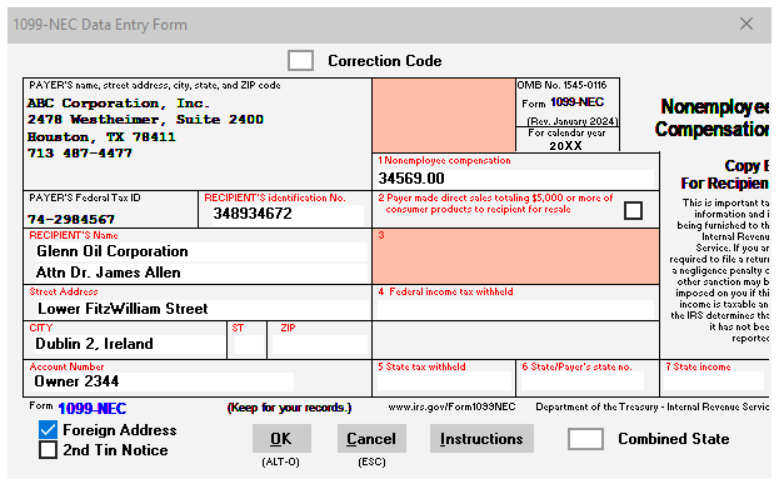
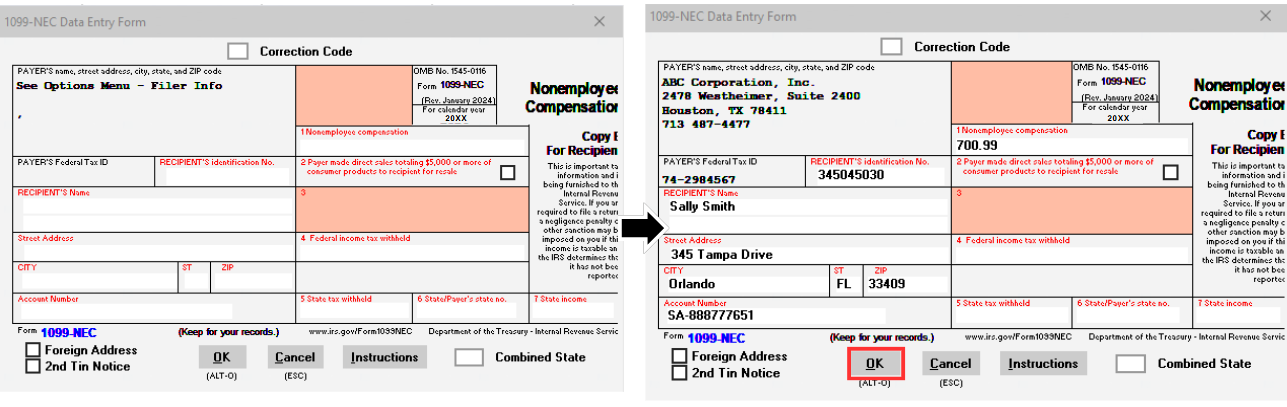
Enter the information required, then click OK (or theALT + O keys).

Recipient data can also be imported from Excel or Brought Forward from previous years.


When entering Tax Identification Numbers (TINs) into 1099Express, ensure proper formatting:


Social Security Numbers (SSN) - (For Individuals) should have 2 dashes.
  • Example: 123-12-1234
Employer Identification Numbers (EIN) - (companies, corporations, individuals and others) should have 1 dash.
  • Example: 98-7654321


To change or edit recipient data, double click the recipient's name in the 1099Express Grid.

A form window will appear, displaying the data currently in the grid.
To make any necessary changes, simply click inside the relevant box on the form.
After making the desired changes, click the 'OK' button at the bottom of the Form Window.


To 'Void' a Record:
  1. Highlight the recipient's name by selecting their line in the grid. Then, click the 'Edit' menu at the top left of the program.
  2. From the drop-down menu, select 'Void this Line'.
This will mark the line as "voided", but keep the recipient in the file for future filings.
*NOTE: Remarked or Voided records are never printed or sent to the IRS.
To 'Un-Void' Data:
Highlight the recipient's line, then open the 'Edit' menu and select the 'UnVoid this Line' option from the drop-down menu.


To Delete a Record Entirely:
  • Highlight the recipient's record in the grid, then go to the 'ADD F3' menu at the top left of the program
    and select 'Delete a Payee Record (Ctrl + Del)' from the drop-down list.

  • Alternatively, users can select the 'Edit' menu and choose 'Cut' to delete the record and copy it to the Windows Clipboard.


To Enter a Foreign Address:
  • Use the 'City' box for the foreign city, province and country. Do not use the state box.

  • Click the 'Foreign Address' check box at the bottom left of the data entry screen.

  • Use the 'Zip' box for the foreign zip code, if any.


Related Topics


Copy & Paste From Excel
Printing on Recipient Copies
What is a Filer & TCC?
Entering Issuer/Filer information

Return to Data Entry ↪