It's getting to be crunch time and your 1099-NEC files are due to the IRS. What do you do??!
Getting Started
Installing the Program
First thing to do is download and get it installed.
If you are just wanting to test the real program, continue on to 'Starting the Program'. This is not a demo program and we encourage you to test it before you purchase it. There are no obligations and if you decide to purchase it, you can activate the program without reinstalling a different version.
Before you can save or e-File to the IRS, you will have to purchase and activate the program.
Starting the Program Video
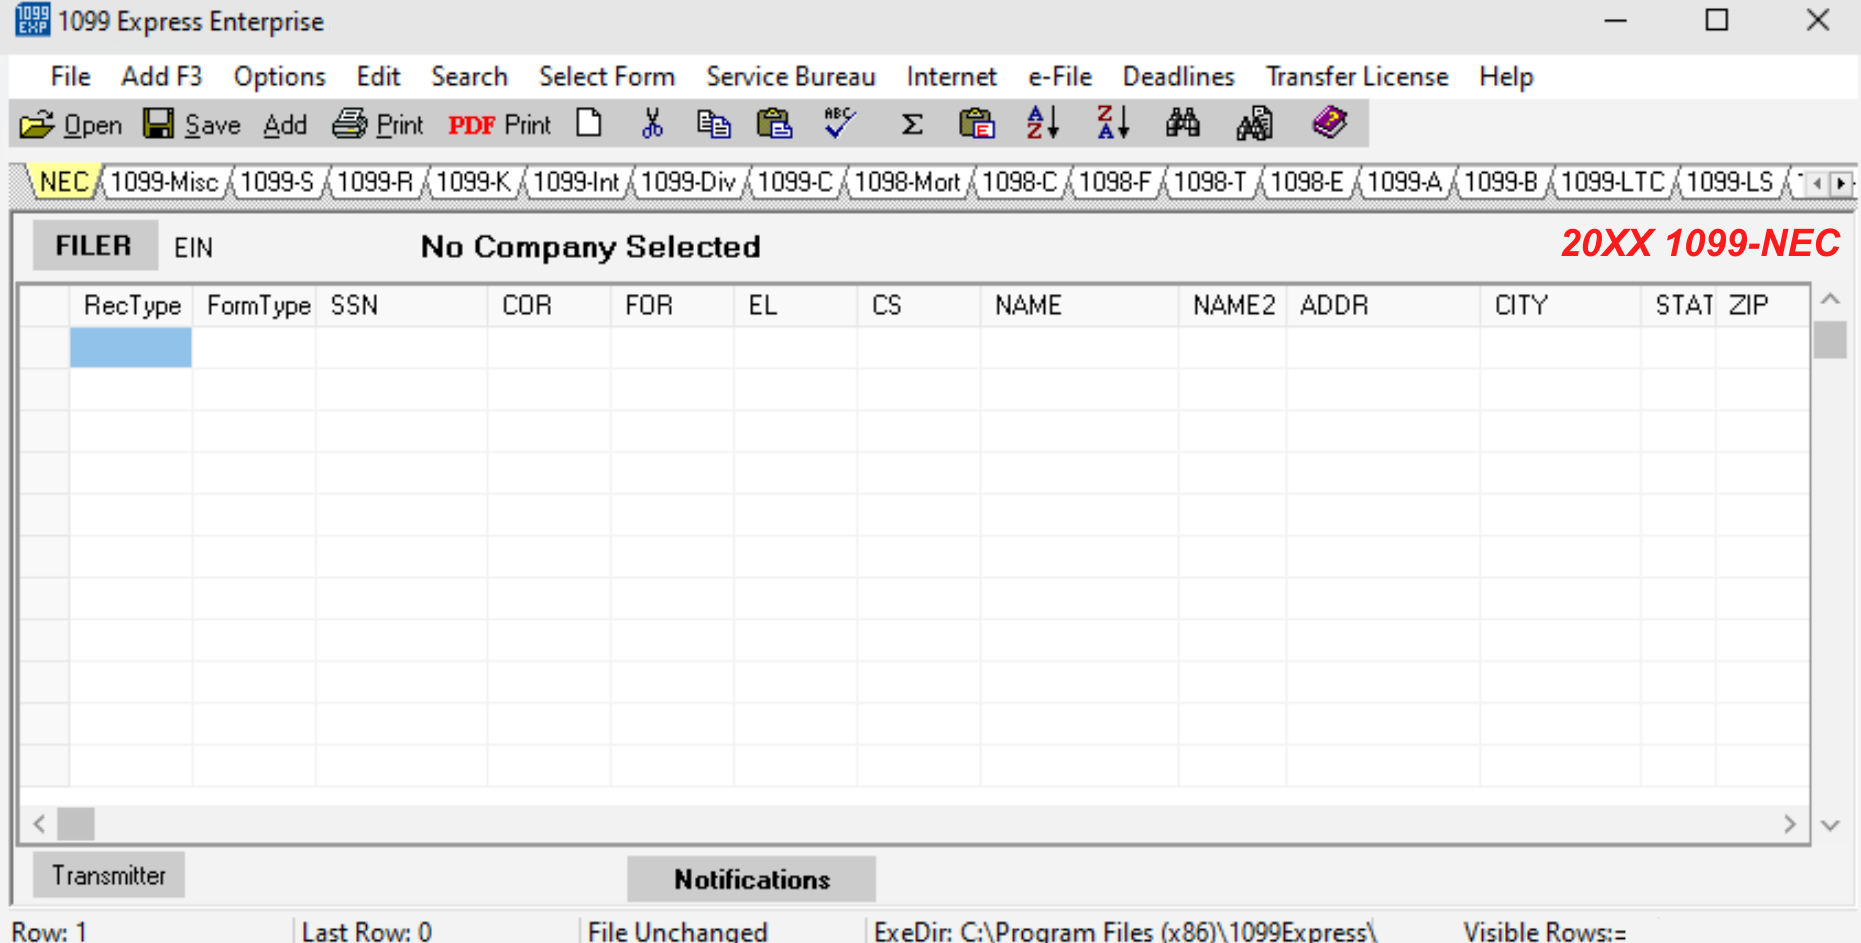
After your install is completed, you should see the 1099 Express icon (Blue Icon) on your desktop. The icon should say '1099 Express 20XX' If the icon is not on your desktop or you can not find, please see our help documentation that talks about the missing icon.

Open the program by double clicking on the program icon. You should be met with 2 popup windows. One window is the About window and the other is the Annual Warning. The About window can be used here to activate the program if you have already purchased. The Annual Warning window is good information about big changes that where made by the IRS for the programs current tax year.
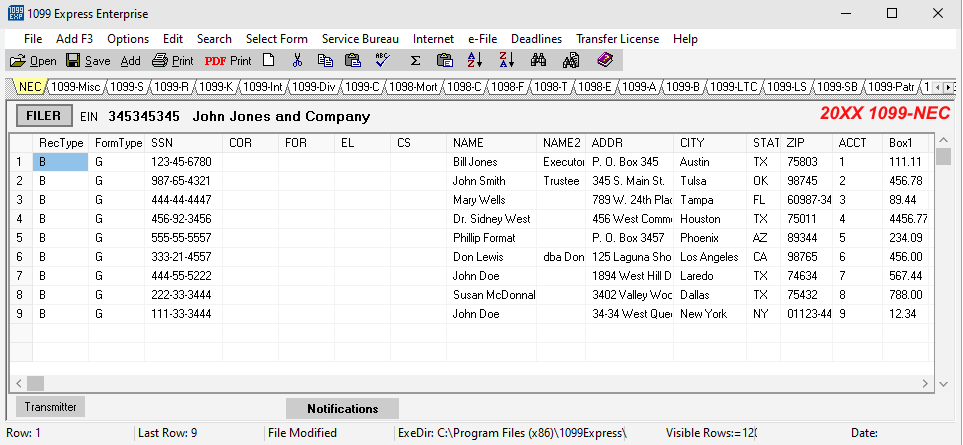
For now, you can click 'OK' on both of these windows and you should see the program with a blank grid like the image below.
Inserting the Company/Filer Information Video
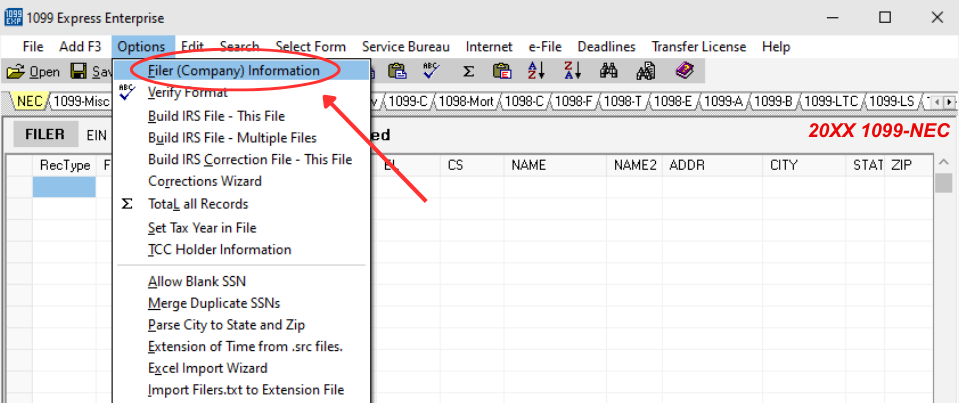
Now we want to populate the Company/Filer Information. First thing to do is to click on the 'Options' menu at the top then select 'Filer (Company) Information'.
For now, do not enter your real company information, instead, go over to the Re-Populate tab inside the Company/Filer Information window. Double click on the entry in the list that says 'Jones Company'. Note that there may be more information in this list but for now just choose this sample company. If you are having problems finding the company, see our help documentation on how this window works.
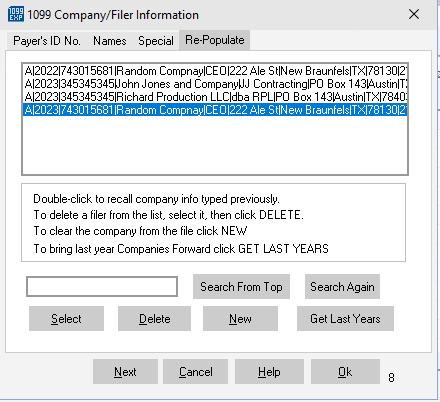
You can now look through the Company/Filer Information and see how everything is filled out. Notice where the tax year and company EIN are located. For more details on what each tab of this window has on it, please see our help documentation on the Company/Filer Information
Importing Data from Excel Video
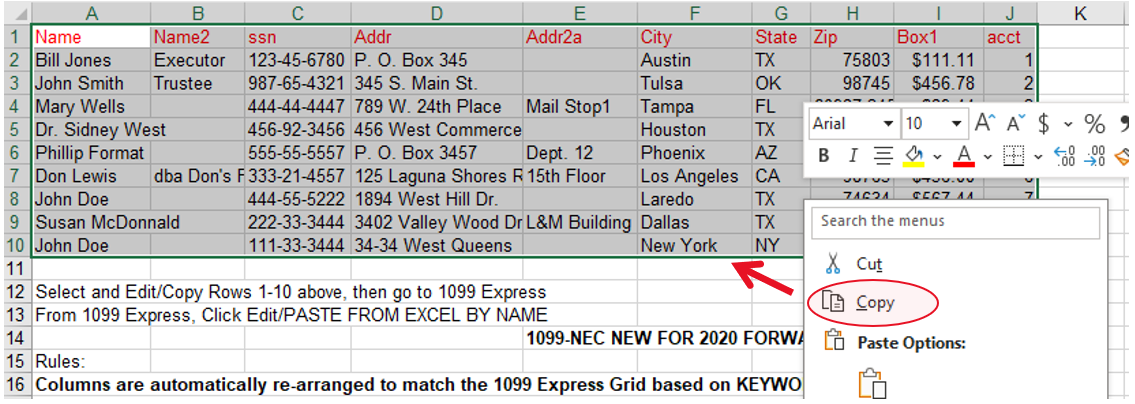
Our program makes importing data from Excel easy. To start, click on the 'File' menu and select the option close to the bottom of the list that says Open Sample Excel Spreadsheet. Now wait for Excel to open this sample spreadsheet.
Once Excel is open, right click on the highlighted part of the Excel Grid and choose 'Copy'-make sure it includes the headers.
Navigate back to the 1099 Express program (possibly behind the Excel window).
Now go to 'Edit' then select the 'Paste from Excel by Header Name' option. You can also right click on the main grid of the program and select 'Paste from Excel by Header Name'.
You should now see the sample Excel spreadsheet data in the main grid of the program. If you have problems, try again following each step exactly or for more information and a more detailed explaination, please visit our help documentation page on 'Paste from Excel by Header Name'.
Saving the File Video
If you are using the program in test mode, you will not be able to save, but you can continue with this guide and go onto 'Adding, Editing, and Correcting Records'.
If you have activated your program, you can now click on the 'File' menu, then click 'Save As'. You can choose the name of this sample file and save it where you want. The default location for saving files is the main folder for the current years program (Ex. 'E20XX').
If the program asks to enter 'Account Number Information', always choose 'Yes'. We ask you to populate the 'Account Number' because without it, corrections maybe impossible without a unique 'Account Number'.
Adding, Editing, and Correcting Records Video
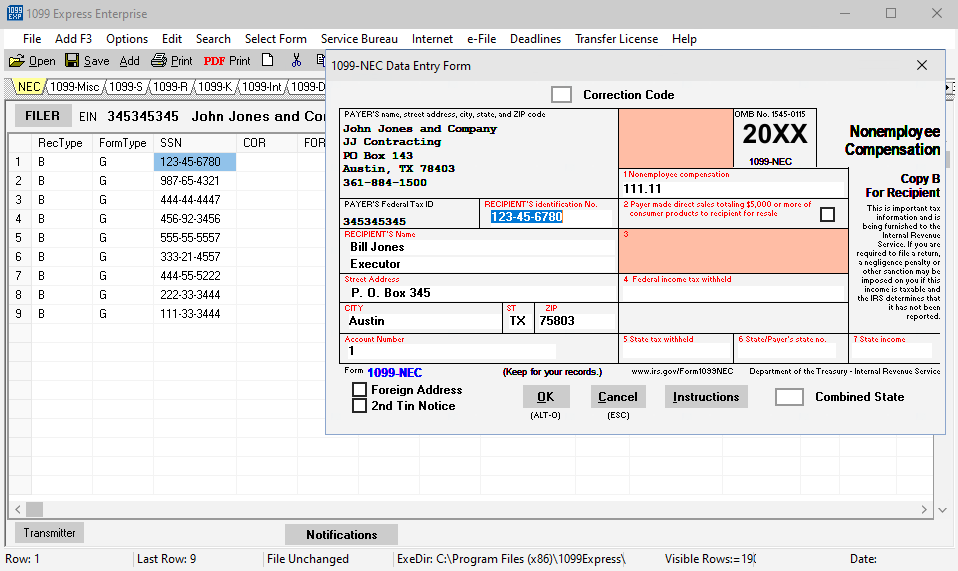
With data in the main grid, double click a line with data in it or select the desired row by clicking on it then going to 'Add F3' then select Change a Payee/Employee. This will open what is called the 'Data Entry Window'. This window allows you to edit or add information to a record (new records also use this window). You can add or change any of the values in this box besides the Company/Filer's Information.
Make sure that after you finish editing a record that you also save your file (if you are in test mode don't worry about this for the sample).
Printing Process Video
To see how a sample printed page looks like, and print using the 'Print a Test Page...' you will need to 'Close' the current file. This will remove all data that is in the grid and Company/Filer currently.
First, go to 'File' and click 'Close (New)'. You will see that all the data that was in the main grid is now gone.
Now that your main grid is empty, go to 'File' and click 'Print a Test Page...' (if you wanted to print normal forms, you would select 'File' -> 'Print (Create) LASER FORMS'). You will now be greated with the 'Page Setup'
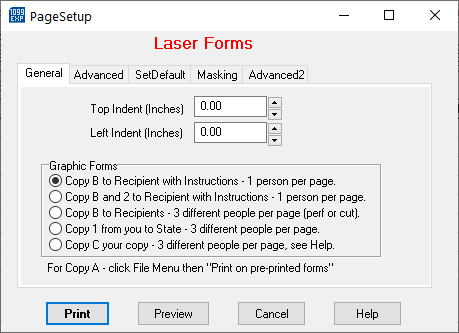
For now, just click on print to send the sample form to your printer. The local print controller window will open for your computer. Select your printer and then print. Depending on how you printed, you should have a sample form that you can view.
Our forms can be tri folded with the mailing address up and will fit directly into a No. 9 windowed envelope. If it does not fit, you can find more information on how to move the address label around to get it to fit your needs.
e-Filing to the IRS Video
There are 2 ways to find this information. First you can go through the program and click on the 'e-Filing' menu and selecting 'How to e-File'. Second you can go hear to see the instructions online.
There are 5 bullet points that show the steps for e-Filing to the IRS. Below these is detailed text on each step and what you need to do. You can e-File at NO COST to the IRS if you have your own Transmitter Control Code (TCC) and a FIRE.IRS.GOV login.
Other Topics
Did you know that:
• 1099 Express has been e-Filing to the IRS since 1988.
• 1099 Express has been an IRS Quality Supplier since 1996.
• Our support team is located in the USA, and has experience with many different IRS compliance issues.