Bringing a File Forward

Bringing Files forward feature is a useful tool to utilize in the 1099 software that will enable the ability to simply bring everything forward from past years filing to the current year software.
By doing so it simplifies the process of just updating 1099's with the money amounts, removing any individuals or any changes to be made.
There are several ways to copy last year’s file or files to this year’s folder.
1.) Use last year’s 1099 Express program to copy the file for files.
2.) Use Windows Explorer to copy the file or files.
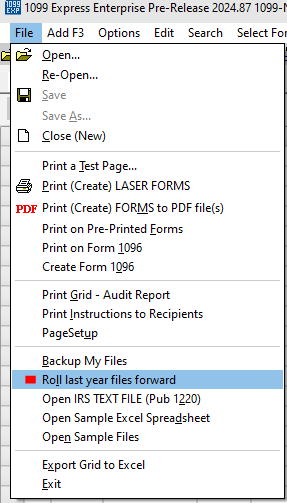
3.) Use the File Menu, then "Roll Last Years files forward" entry.
Using Last Years Program:
Open the previous year 1099 software. Click 'File' and select 'Re-Open' from the drop-down menu. A box will appear with all the file(s) that have been created & saved.
Verify the correct file, select, and open.
Select 'File', 'Save As' (This is where the name of the file can be edited to have the current tax year) and save to this Years Folder.
This is one option to save past files into the new 1099 software.
Open the current year 1099 software. Select 'File' then 'Open' and this is where changes can be made to the file for the current year. Always verify the 'Filer information (company information)'.
To do so select 'Options' and select 'Filer (company) Information'. Set the correct Tax Year. Once all changes have been made 'Save'. Any printing can now begin.
Using Windows File Explorer:
Open your computer's File Explorer (the icon that looks like a manilla folder). It can be found either on your taskbar on the bottom of your computer screen
or found in your Windows start menu .
Navigate to the prior year's folder (labeled E2023 or earlier) found in your Local Disk (C: Drive). Select the file(s) needed for transfer and right-click copy.
Return to your Local Disk (C:) and find the most current year's folder (E20XX where the 'XX” is the program's year) and paste all files into this folder. From here, start up 1099 Express
for the current year. Open last year's file and start making your changes.
Using the File Menu then "Roll last year's files forward":
Start this year's 1099 Express Enterprise program.
Click the File menu, then "Roll last year's files forward".
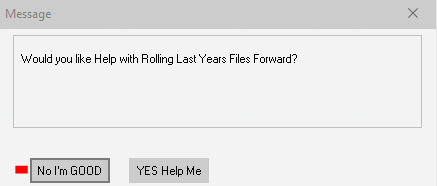
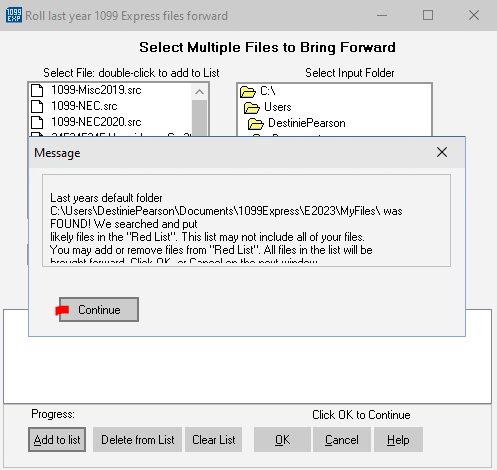
A pop-up window will appear asking ”would you like help with rolling last year's files forward?”,
select 'No I'm Good' to .Please note that this method attempts to help determine which files were used last year. It allows for viewing any file and determining if it should be added to a list.
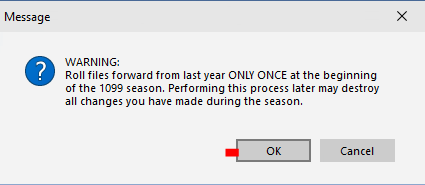
Then click 'OK' to acknowledge the "Warning".
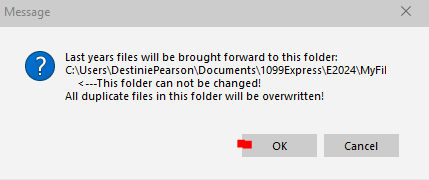
Click 'OK' to the next message pop-up window to continue.
Another pop-up window will populate with short instructions on how to move the files into the most current program's folder. Click 'Continue' to proceed.
Then select the necassary folder on the right window box, and proceed to add the file(s) required from left window box by either double clicking the name or selecting the 'Add All' button.
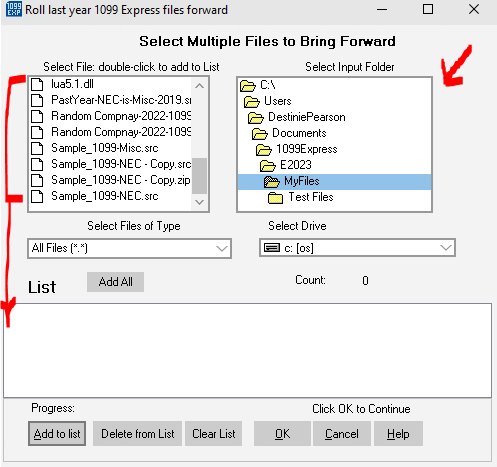
Once the list is selected, click 'OK' to complete the process.
Bringing a Filer/Issuer information Forward
Bringing a Filer (Company Information) Forward
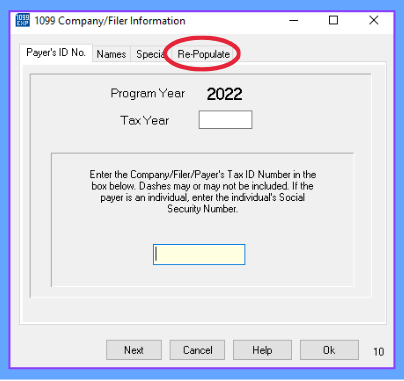
1.) Select the 'Options' tab on the top center of the program. (Or select the FILER button on the top left).
2.) Select 'Filer (Company Information)' from the drop-down menu.
3.) From the populated window, select the 'Re-Populate' tab.
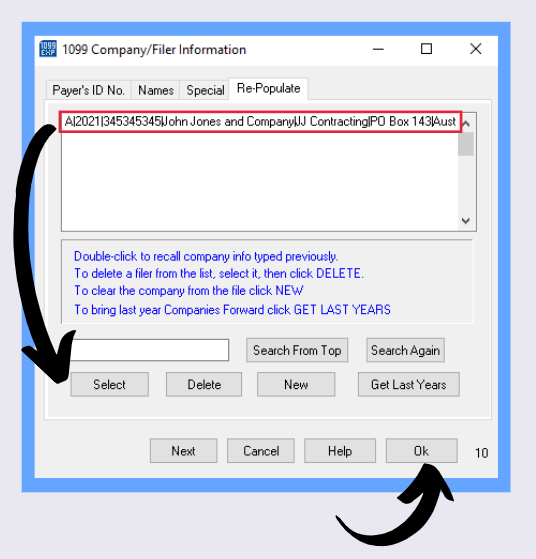
4.) From the list provided, select the Filer information needed (as seen below) then return to the 'Payer's ID No.' tab to verify all information.
5.) Once all information has been verified to be correct click the 'OK' button on the bottom of the window.
If further assitance is needed, please Contact Our Office.