Open the most current version of 1099Express.
|
 |
|---|---|
| After checking the data, save the file. | 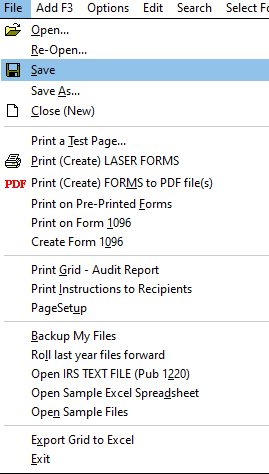 |
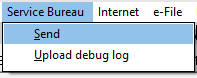
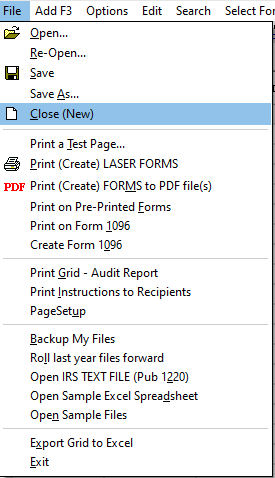
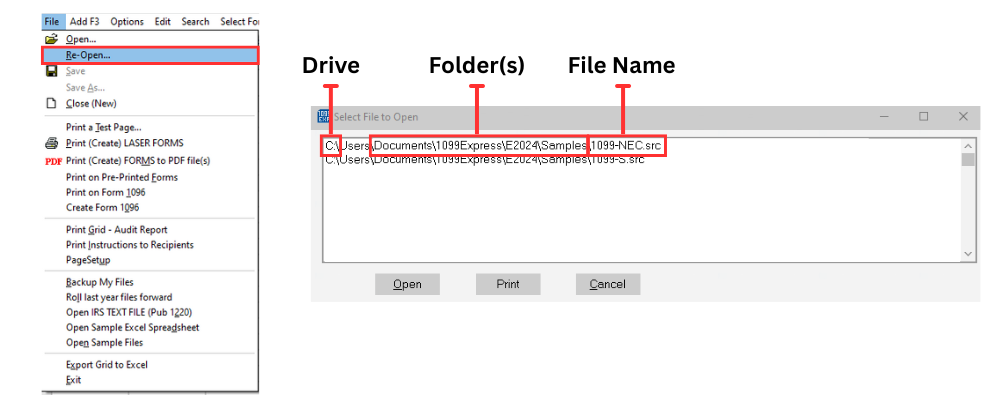
Once the file is saved and ready to send, select the 'Service bureau' menu on the top center and click the 'Send' option.
|
 |
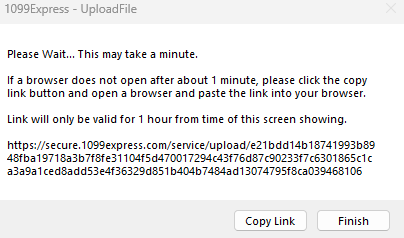
When the progress bar is done a message will appear from the program and a browser will open to the 1099Express File Upload page.
|
 |
| Follow the instructions on the Data Entry page and proceed to payment. | 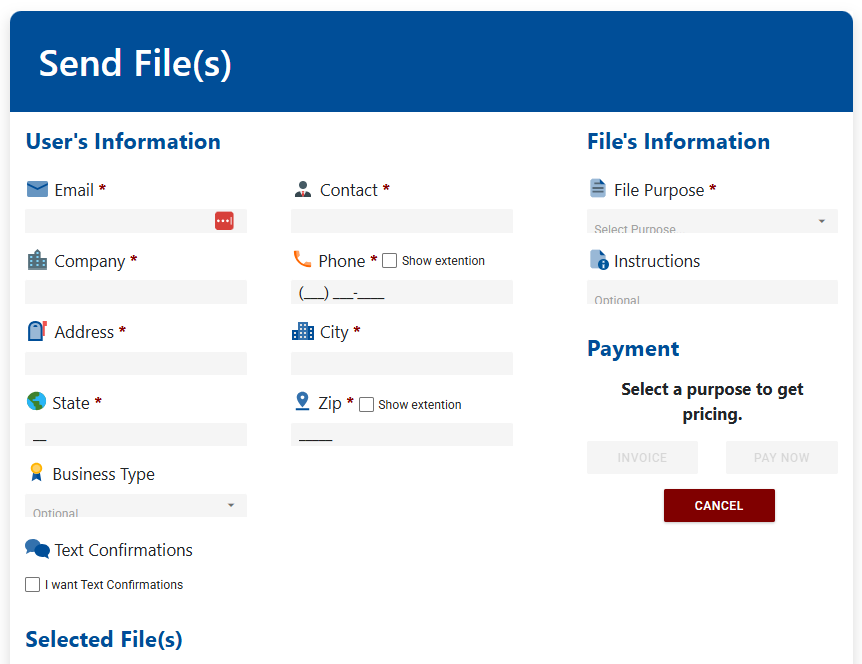 |

e-Filing Through 1099Express
Prices for e-Filing services can be found here: e-Filing I 1099Express.com
To e-File using the 1099 Express Service Bureau, please refer to the instructions below:
Open the most current version of 1099Express.
|
 |
|---|---|
Select 'Service Bureau' menu and select the 'Send' option from the drop-down list.
|
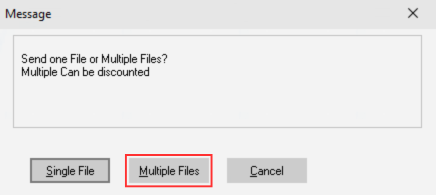 |
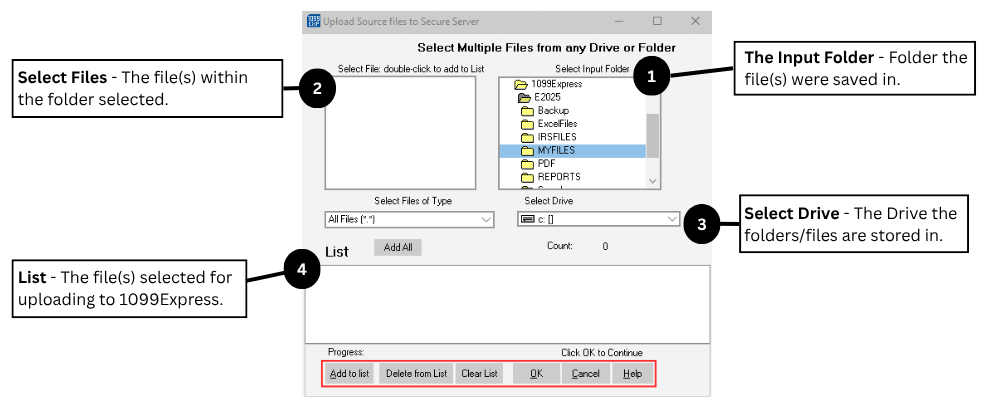
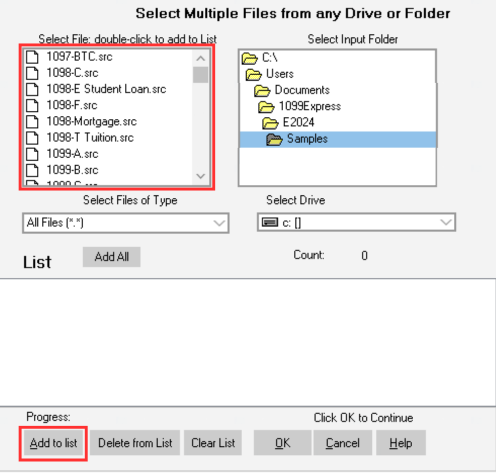
| A File Selection window will populate, navigate to the folder the files are located. |
 |
|---|
Please Note:
 |
To add files to the list, double-click the file name in the left window or click the file name to select it and then click the
'Add to List' button.
|
 |
|---|---|
| Once all files required are in the list in red, click OK to complete the upload process. |  |
When the progress bar is done a message will appear from the program and a browser will open to the 1099Express File Upload page.
|
|
| Follow the instructions on the Data Entry page and proceed to payment. | |
Data Entry Page
To complete the upload process, enter the following information:
- Enter a valid email into the 'Email' field. If file(s) were uploaded previously, please check any populated data to verify the information is correct.
- Once the email is verified, a green checkmark will appear.
⚠ If an orange caution symbol appears, it may indicate that the email provided is not registered to an account with our cmpany.
Complete the Data Entry page to create an account using the email. - Fill out or update the information displayed on the form.
- Validate that the files selected for upload (and the number of records in those files) are correct in the 'Selected File(s)' section.
The record count only counts the number of non-voided (or 'B' records) that are in the file(s). - Select the purpose of this upload under the 'File's Information' section.
Depending on the files that where selected, different options may appear. - Once the desired purpose is selected (e-Filing IRS, e-Filing to States, Print & Mail, etc.), the price of the upload will be displayed below.
Please Note:
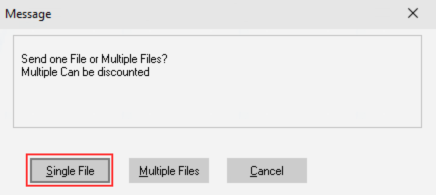
Payment selections are divided into two options -
INVOICE PAY NOW - Invoice - The user will receive an invoice via email, and the payment prompt will be skipped.
⚠ The discount for submitting multiple files will not be applied after selection. - Pay Now - This selection is most reccomended for users submitting multiple files.
If payment is made at the point of upload with a credit card/e-check, the multiple upload discount will be applied.
An invoice will be sent to the email provided in the Data Entry page after payment.
- Invoice - The user will receive an invoice via email, and the payment prompt will be skipped.